> ## Documentation Index
> Fetch the complete documentation index at: https://docs.biomni.phylo.bio/llms.txt
> Use this file to discover all available pages before exploring further.
# Quickstart
> Get up and running with Biomni Lab in minutes
This guide walks you through creating your first task, understanding the interface, and working with results.
## Creating a Task
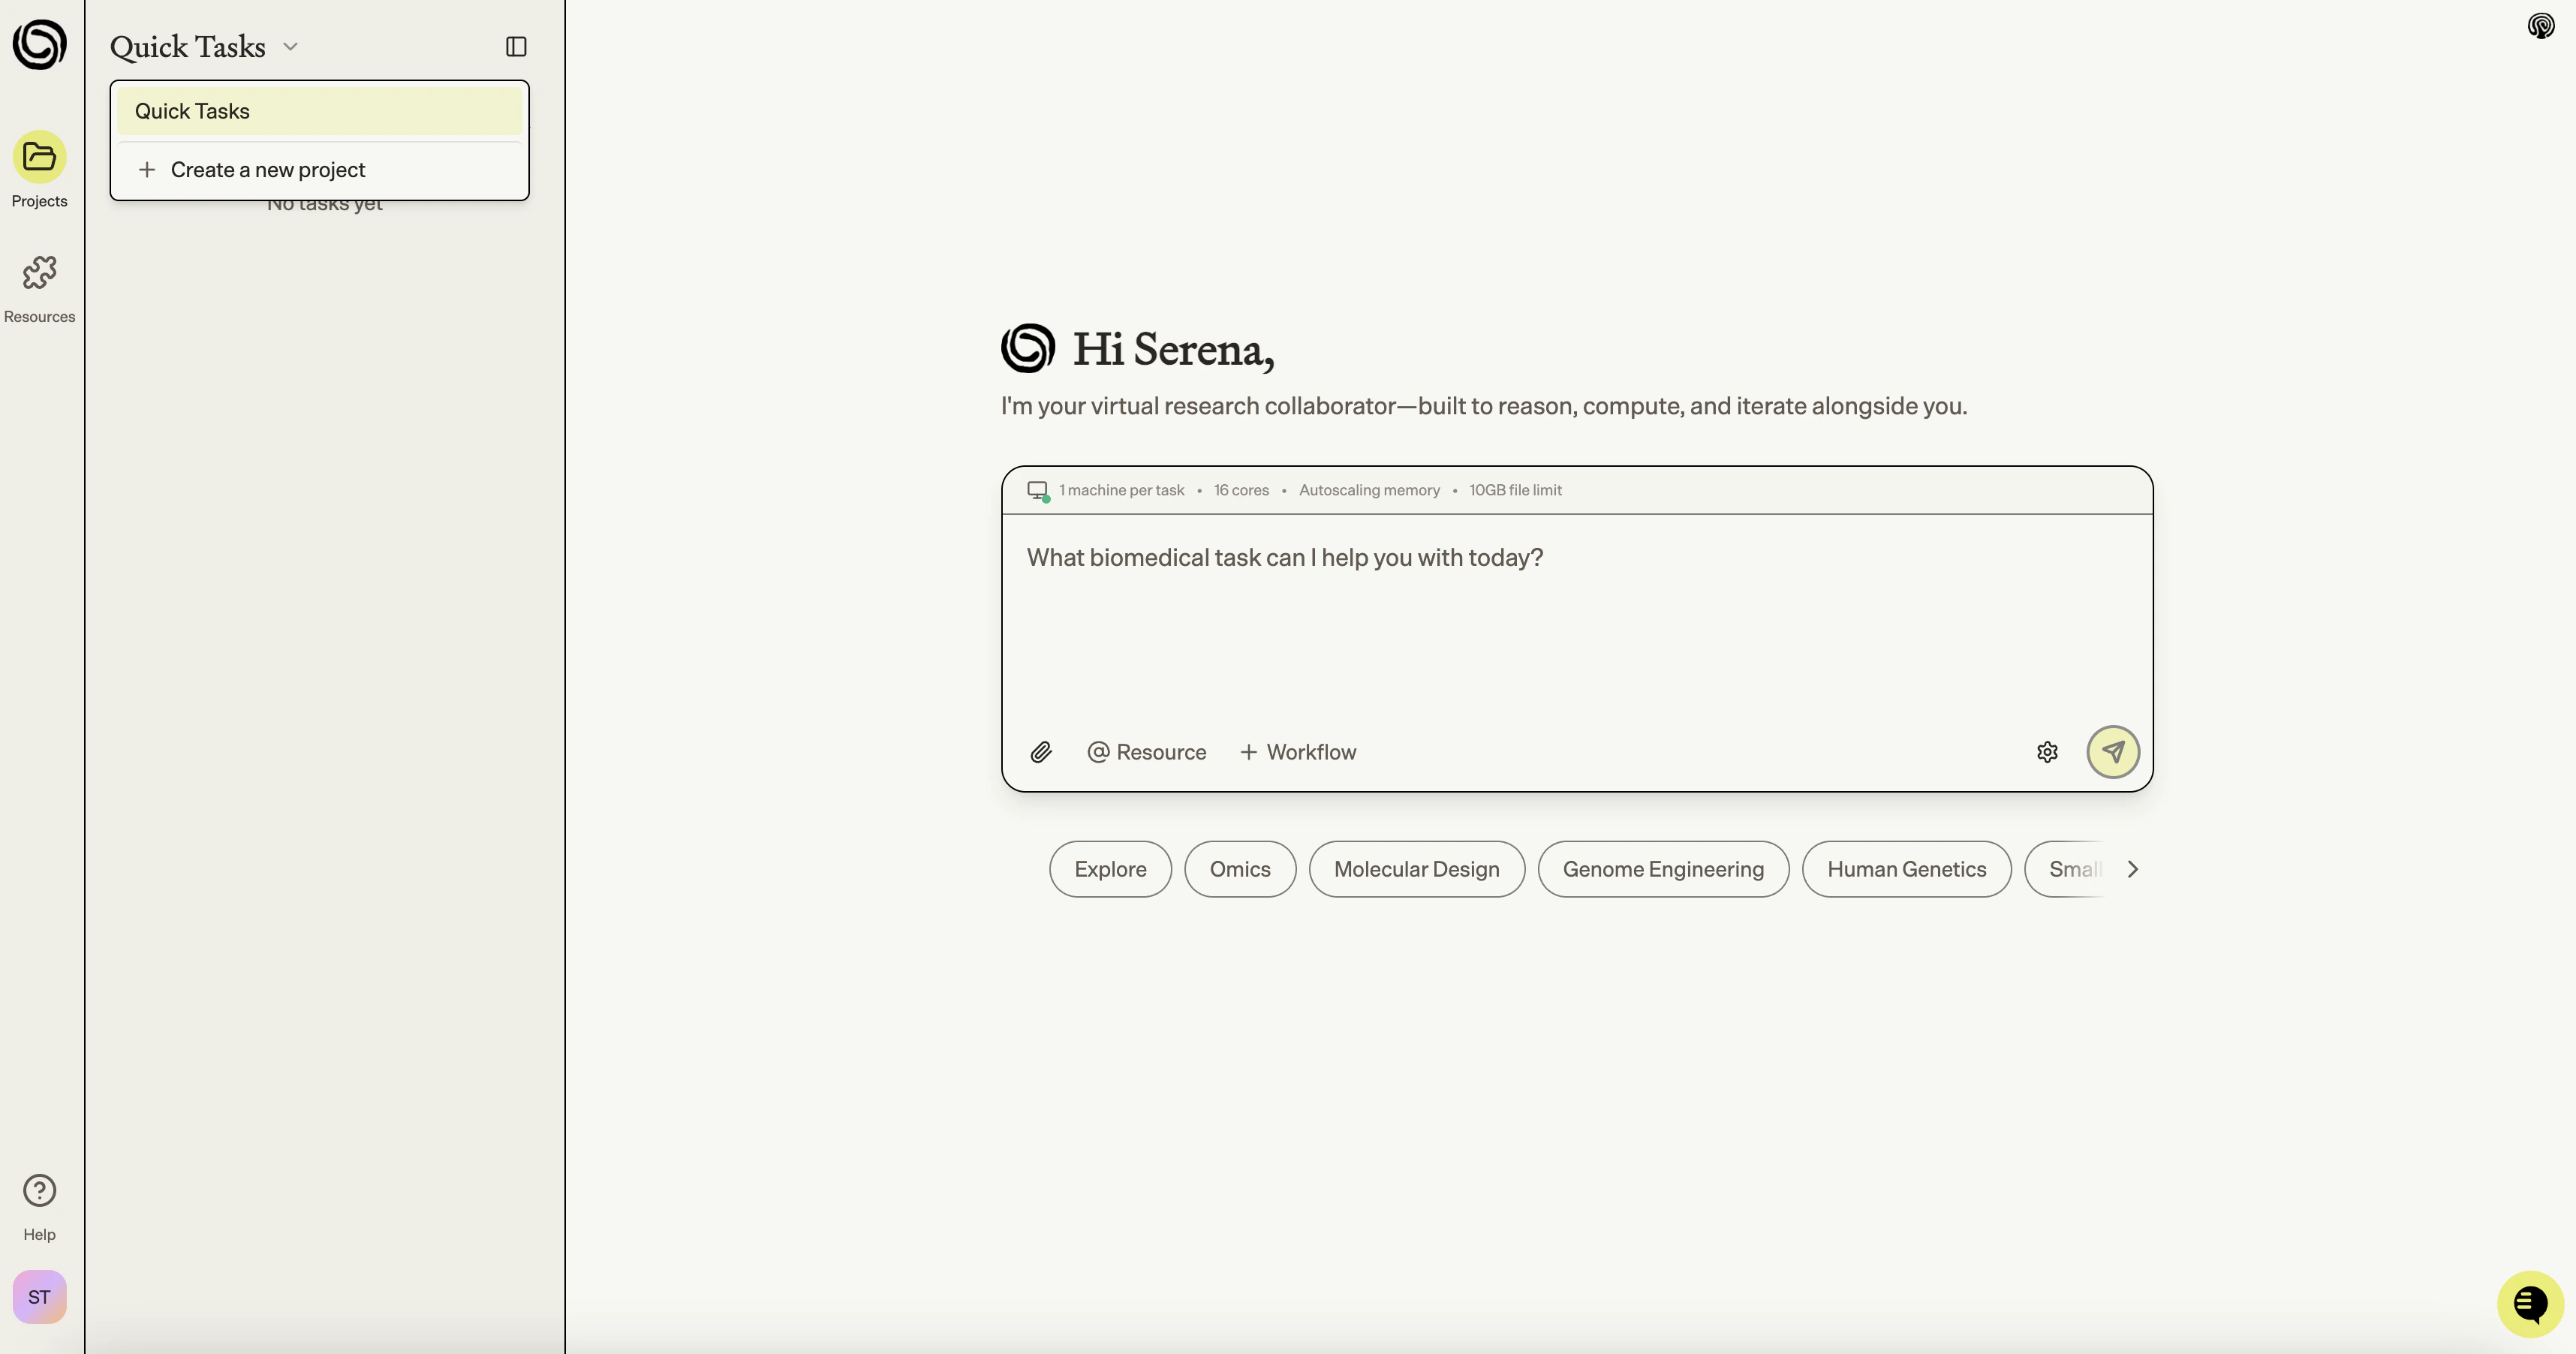
When you first log in, Biomni Lab opens a Quick Task by default so you can start working right away. You have two options for creating new analyses:
1. Click the **+ Create** button in the sidebar
2. Select **Quick Task**
3. You'll be taken directly to a new chat session
Quick Tasks are ideal for one-off analyses or exploring Biomni Lab's capabilities.
1. Click the **+ Create** button in the sidebar
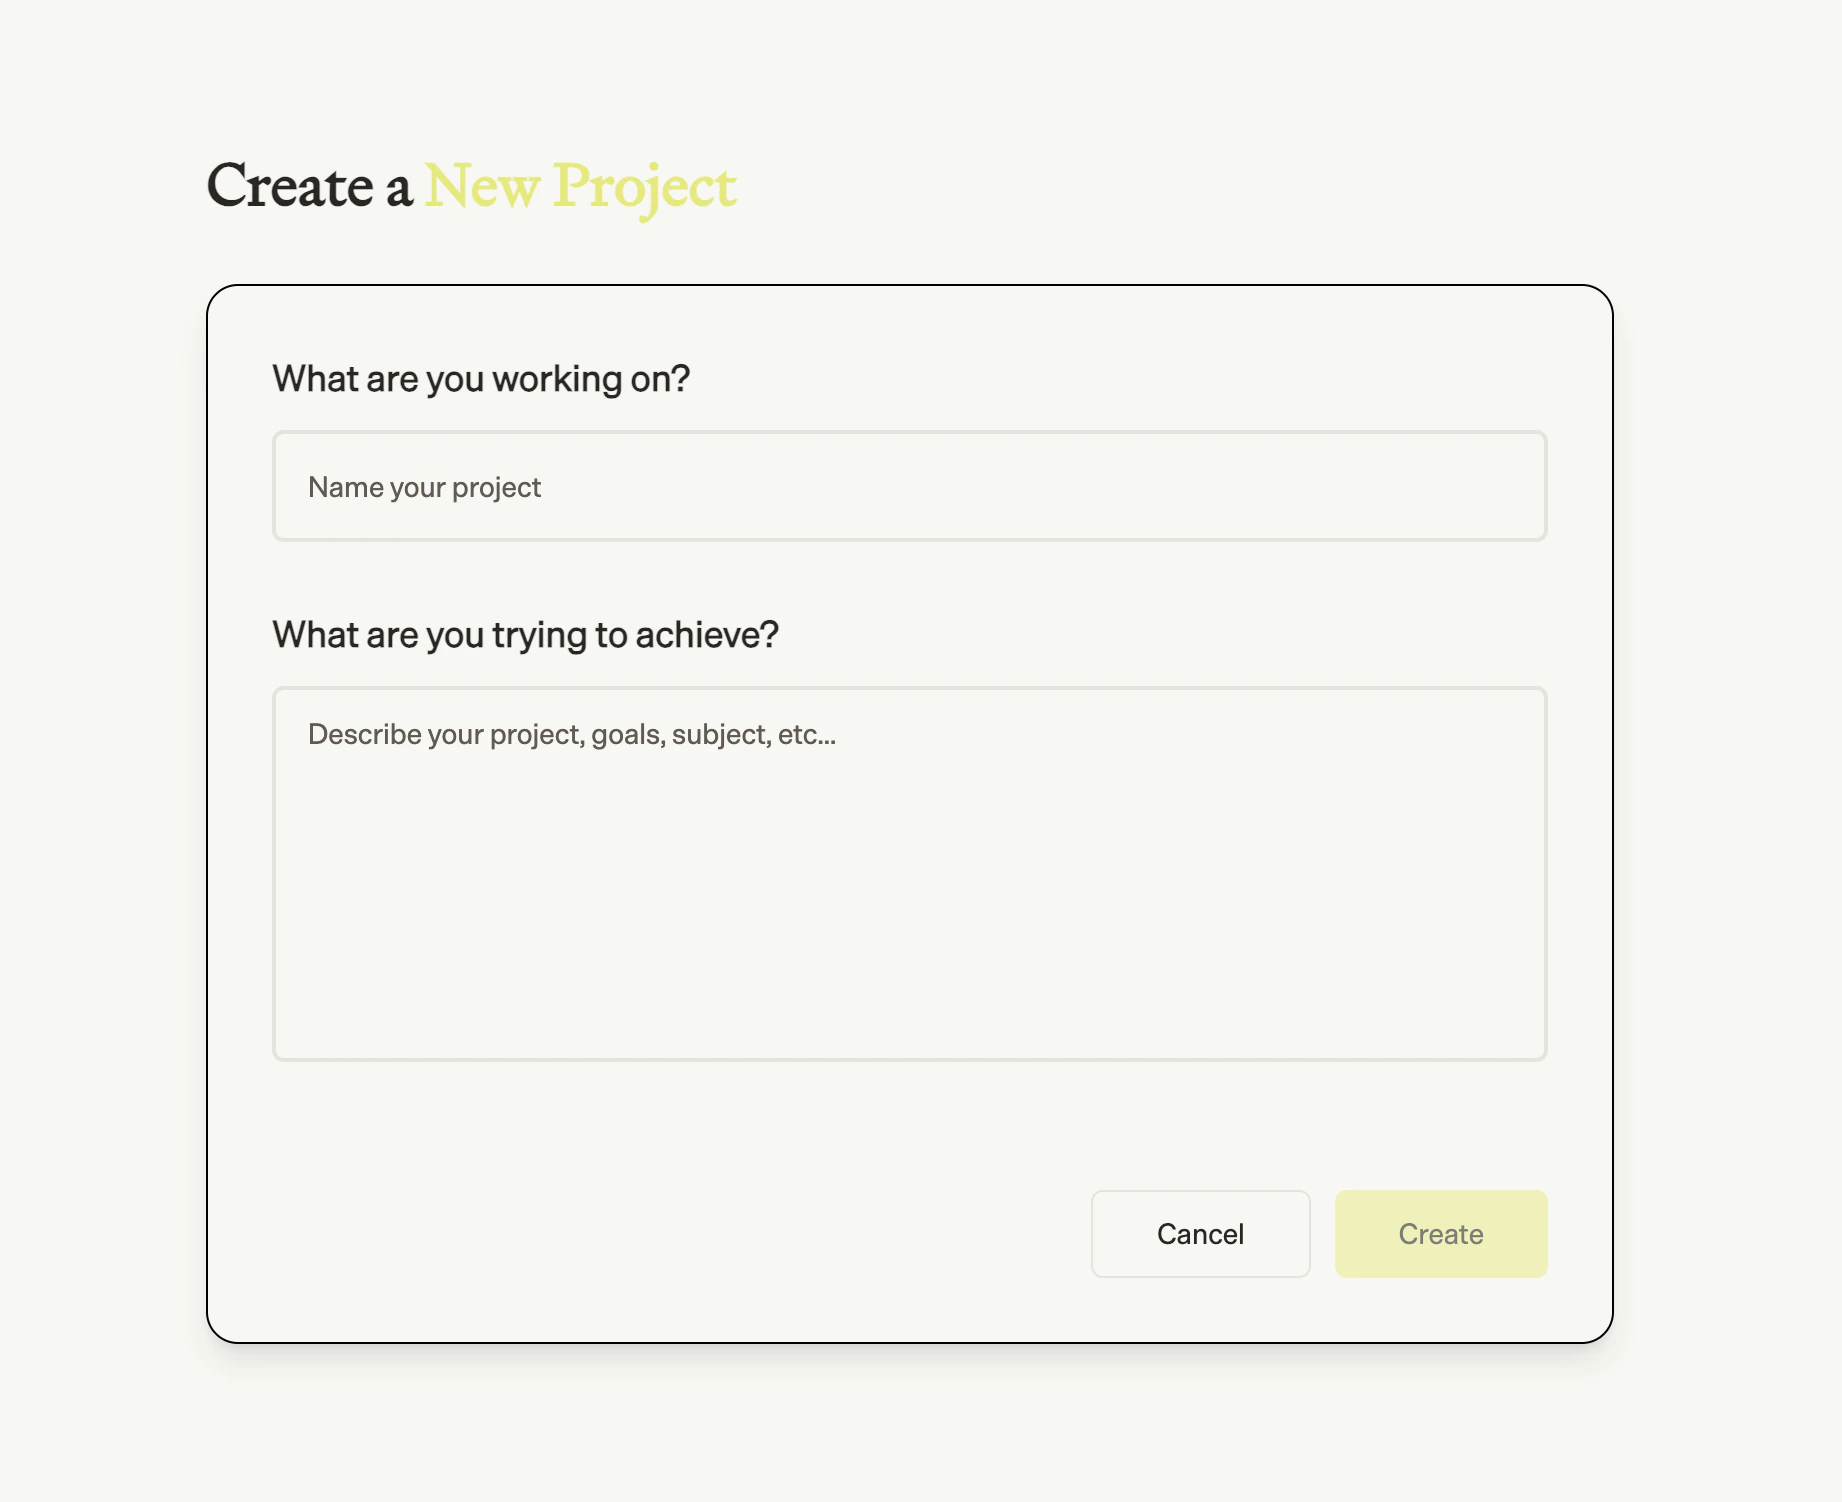
2. Select **New Project**
3. Give your project a name and description
4. Create tasks within your project to organize related work
Projects help you organize related analyses and keep your work structured.
## Using Workflow Templates
Workflow templates provide pre-built analysis workflows curated by the Biomni Lab team:
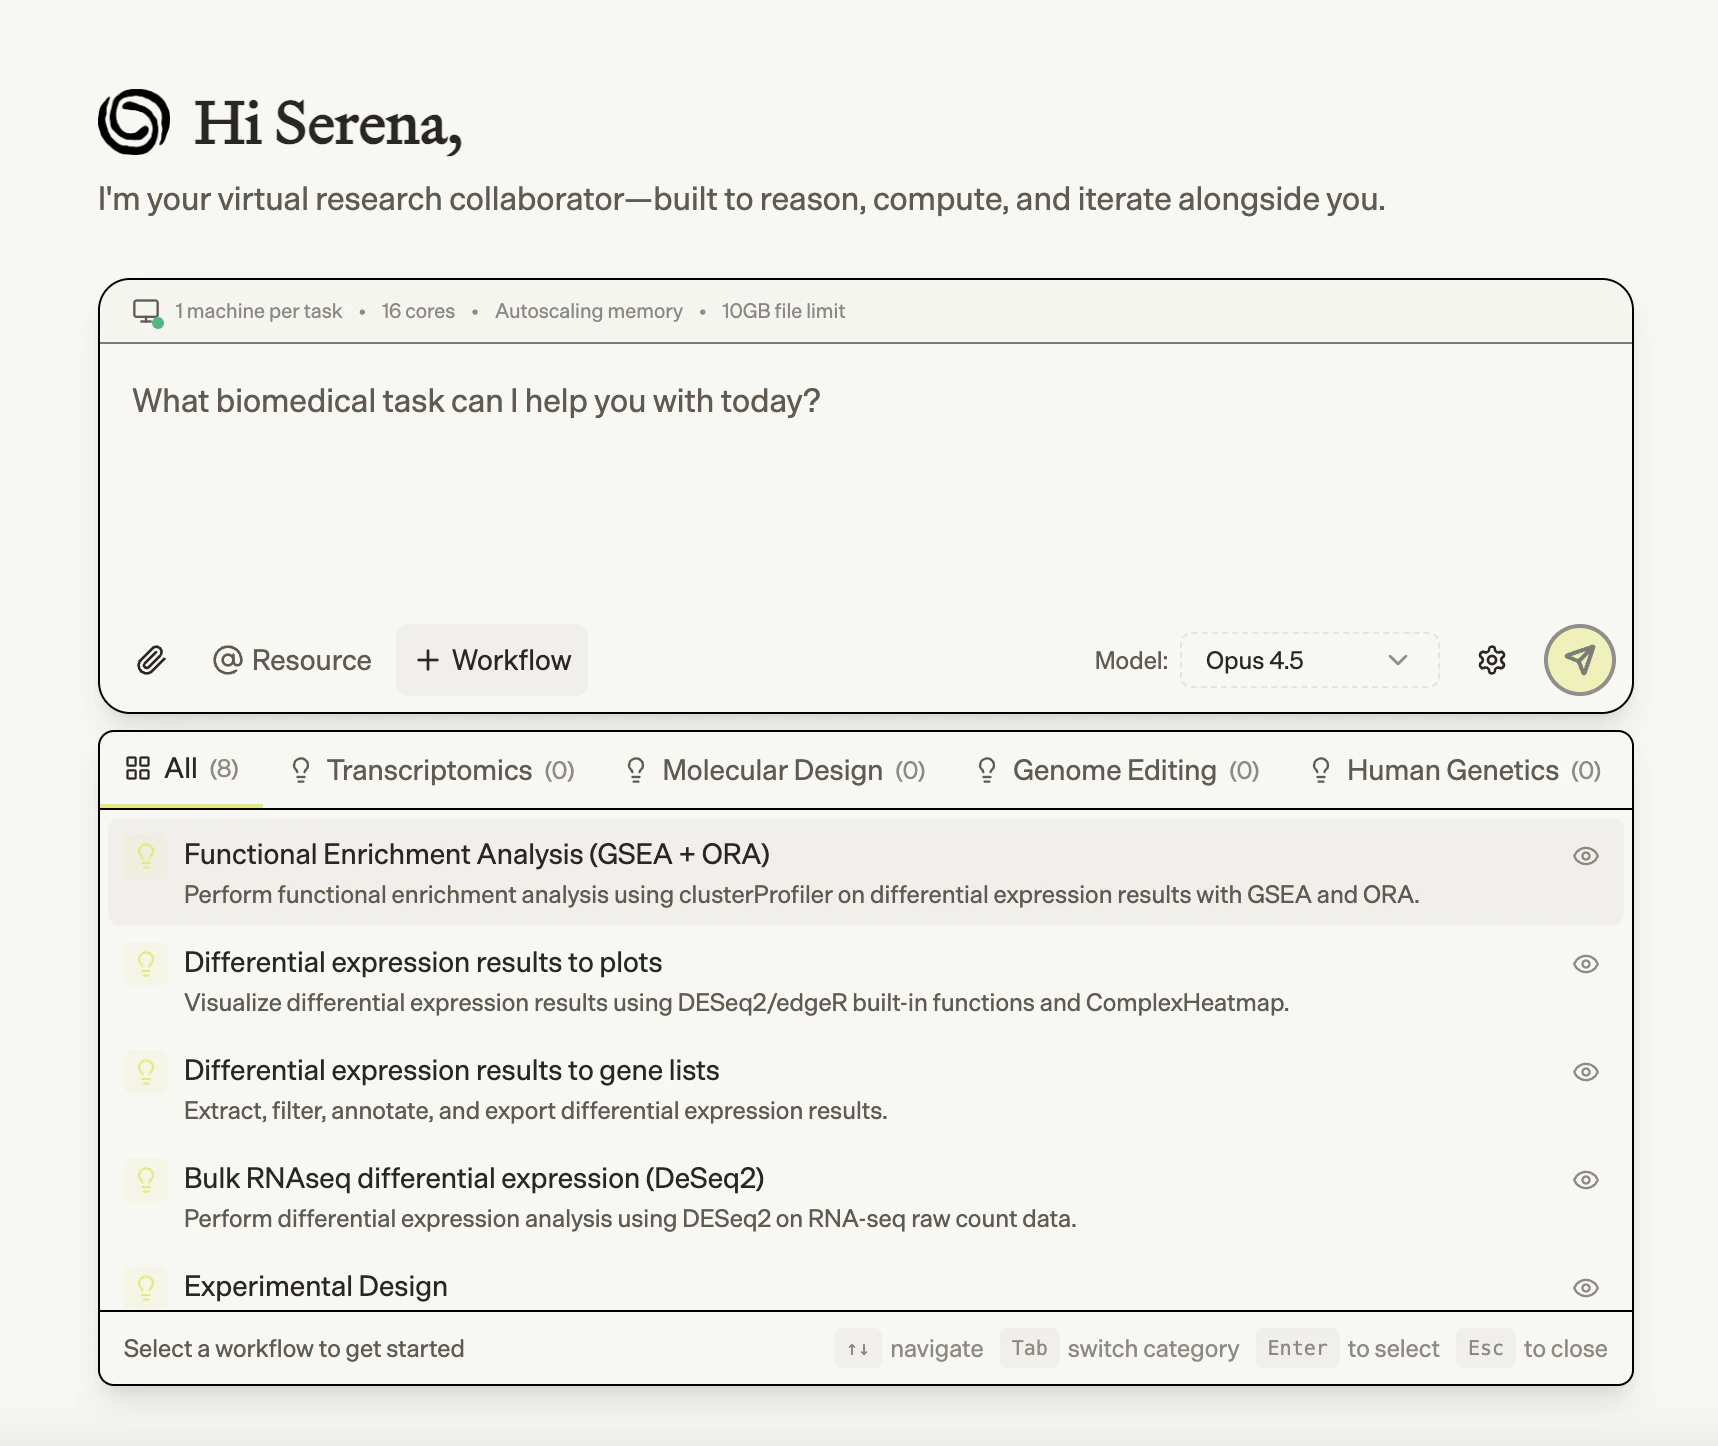
1. Click the **+ Workflow** button in the chat input area, or look for suggested templates displayed in the chat
2. Browse templates by category or search for specific workflows
3. Click on a template to see what it does
4. Click **Use Template** to apply it to your task
5. Provide the required input files when prompted
Templates include optimized parameters for common use cases. You can ask Biomni Lab to adjust parameters after applying a template.
## Submitting a Request
### Writing Your Request
Type your analysis request in the chat input at the bottom of the screen. Be specific about:
* What you want to accomplish
* Which files to use (reference them with `@`)
* Any specific tools or parameters
### Using @ Mentions
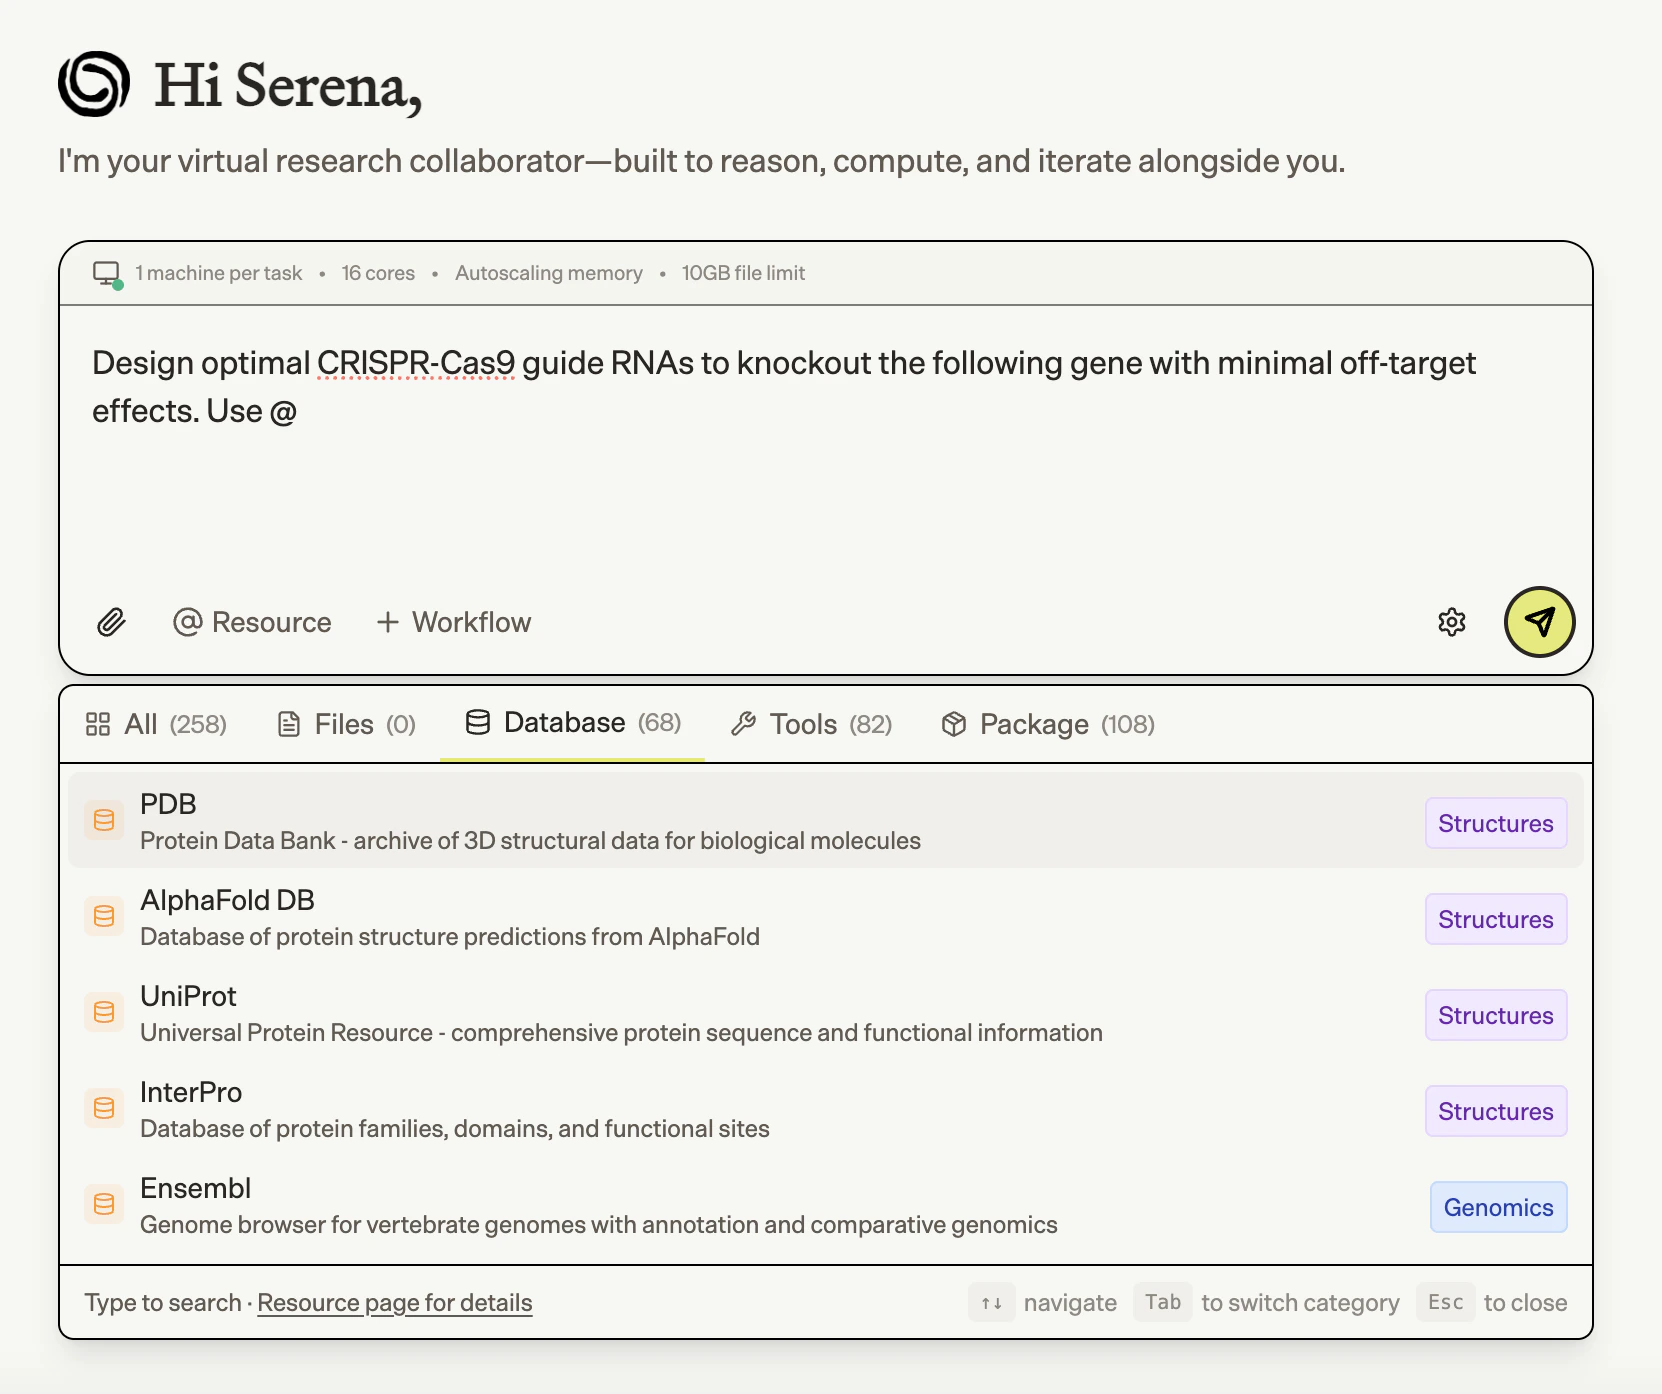
Reference files and resources directly in your message by typing `@`:
```
Align @sample_R1.fastq.gz and @sample_R2.fastq.gz to the human
genome using @STAR, then quantify gene expression
```
When you type `@`, a dropdown menu appears with:
* **Files**: Your uploaded files
* **Databases**: Reference databases like UniProt, NCBI
* **Tools**: Bioinformatics tools like BLAST, STAR
* **Packages**: R/Python packages like DESeq2, Seurat
### Attaching Files
Click the **paperclip icon** to attach files to your request:
1. Click the paperclip icon in the chat input
2. Choose your source:
* **From Computer**: Select files or folders from your local machine
* **From Biomni Lab**: Choose from files you've already uploaded to Biomni Lab
3. Files appear as attachments in your message
4. Submit your request
You can upload entire folders at once—useful for paired-end reads or multi-sample datasets.
## Understanding the Response
### Startup Time
After submitting a request, Biomni Lab begins processing. You'll see:
1. **Planning phase**: Biomni Lab analyzes your request and creates an execution plan
2. **Initialization**: Resources are allocated (this may take a few moments for complex analyses)
3. **Execution**: The analysis runs with real-time progress updates
Initial startup may take 10-30 seconds as Biomni Lab prepares the computational environment. Subsequent requests in the same session start faster.
### The Execution Trace
As Biomni Lab works, you'll see a **trace** of its actions in the chat:
* **Thinking**: Biomni Lab's reasoning about how to approach your request
* **Tool calls**: Commands being executed (alignment, analysis, etc.)
* **Results**: Output from each step
* **Status updates**: Progress indicators for long-running operations
Click on any trace step to expand it and see more details.
## Working with the Workspace Layout
Biomni Lab uses a three-panel layout to organize your work.
### The Three Panels
* **Chat Panel (Left)**: Your messages, Biomni Lab's responses, and trace sections
* **Center Panel (Middle)**: File previews, artifacts, and expanded module views
* **Modules Column (Right)**: Plan, Results, and Notes stacked vertically
### Working with Modules
The right column contains three key modules:
* **Plan**: View the analysis workflow steps and progress
* **Results**: Browse and download generated files
* **Notes**: Add session notes and documentation
Click any module to expand it in the center panel for a larger view.
Use the **Layout** button in the chat header to toggle which modules are visible.
## Viewing and Downloading Results
Results appear in two places:
1. **In the chat**: As openable artifacts you can click to expand
2. **In the Results module**: All generated files from your session
### Working with Result Files
Each result file has several actions available:
* **View**: Click on any file to open it in the right panel for a full preview
* **Download**: Click the download icon to save the file to your computer
* **Find source**: Click to jump to the trace step that created this file
## Follow-up Requests
Continue the conversation to refine your analysis:
### Iterating on Results
```
The volcano plot looks good, but can you:
- Increase the font size
- Add gene labels for the top 10 significant genes
- Change the color scheme to blue/red
```
### Building on Previous Analysis
Reference earlier results in your follow-up:
```
Using the differentially expressed genes from the previous analysis,
run GO enrichment analysis for biological processes
```
### Suggested Follow-up Questions
After completing an analysis, Biomni Lab generates suggested follow-up questions to help you explore your results further. These appear as clickable suggestions below the response:
What are the top upregulated genes?Run GO enrichment analysisCreate a volcano plot
Click any suggestion to automatically add it to your chat input.
### Asking Questions
You can ask Biomni Lab to explain results or suggest next steps:
```
What do these results mean? Which genes should I focus on for
further validation?
```
## Running Multiple Sessions in Parallel
You can run multiple analyses simultaneously:
1. **Open a new task**: Click **+ Create** > **Quick Task** while an analysis is running
2. **Switch between tasks**: Use the **Tasks** panel in the sidebar to switch
3. **Monitor progress**: Each task runs independently with its own progress
Running analyses in parallel is useful when you have multiple samples to process or want to try different approaches simultaneously.
## Accuracy & Verification
Biomni Lab includes multiple features to ensure accuracy and help you verify results.
### Review Mode
Click the **Review** button at the top of any session to enter review mode:
In review mode, you can:
* See all claims and statements with their supporting evidence
* Verify citations and references
* Check data sources used in the analysis
* Identify any assumptions made
### Citations & References
Biomni Lab provides citations for:
* **Database queries**: Links to source records (UniProt, NCBI, PDB, etc.)
* **Literature references**: DOIs and links to published papers
* **Tool documentation**: References to official tool documentation
* **Statistical methods**: Citations for analytical approaches used
### Hallucination Guardrails
Biomni Lab uses multiple safeguards to prevent AI hallucinations:
* **Source verification**: Claims are cross-referenced against databases
* **Confidence indicators**: Uncertain results are flagged
* **Data validation**: Input and output data are validated against expected formats
* **Reproducible workflows**: All steps are logged and can be reproduced
While these guardrails significantly reduce errors, always verify critical findings through independent sources, especially for clinical or publication-ready research.
## Next Steps
Now that you understand the basics:
Learn tips for writing effective requests
Organize your work and files
Explore 60+ databases and tools
Common questions and answers
 ### Attaching Files
Click the **paperclip icon** to attach files to your request:
1. Click the paperclip icon in the chat input
2. Choose your source:
* **From Computer**: Select files or folders from your local machine
* **From Biomni Lab**: Choose from files you've already uploaded to Biomni Lab
3. Files appear as attachments in your message
4. Submit your request
### Attaching Files
Click the **paperclip icon** to attach files to your request:
1. Click the paperclip icon in the chat input
2. Choose your source:
* **From Computer**: Select files or folders from your local machine
* **From Biomni Lab**: Choose from files you've already uploaded to Biomni Lab
3. Files appear as attachments in your message
4. Submit your request
 Click on any trace step to expand it and see more details.
## Working with the Workspace Layout
Biomni Lab uses a three-panel layout to organize your work.
### The Three Panels
* **Chat Panel (Left)**: Your messages, Biomni Lab's responses, and trace sections
* **Center Panel (Middle)**: File previews, artifacts, and expanded module views
* **Modules Column (Right)**: Plan, Results, and Notes stacked vertically
### Working with Modules
The right column contains three key modules:
* **Plan**: View the analysis workflow steps and progress
* **Results**: Browse and download generated files
* **Notes**: Add session notes and documentation
Click on any trace step to expand it and see more details.
## Working with the Workspace Layout
Biomni Lab uses a three-panel layout to organize your work.
### The Three Panels
* **Chat Panel (Left)**: Your messages, Biomni Lab's responses, and trace sections
* **Center Panel (Middle)**: File previews, artifacts, and expanded module views
* **Modules Column (Right)**: Plan, Results, and Notes stacked vertically
### Working with Modules
The right column contains three key modules:
* **Plan**: View the analysis workflow steps and progress
* **Results**: Browse and download generated files
* **Notes**: Add session notes and documentation
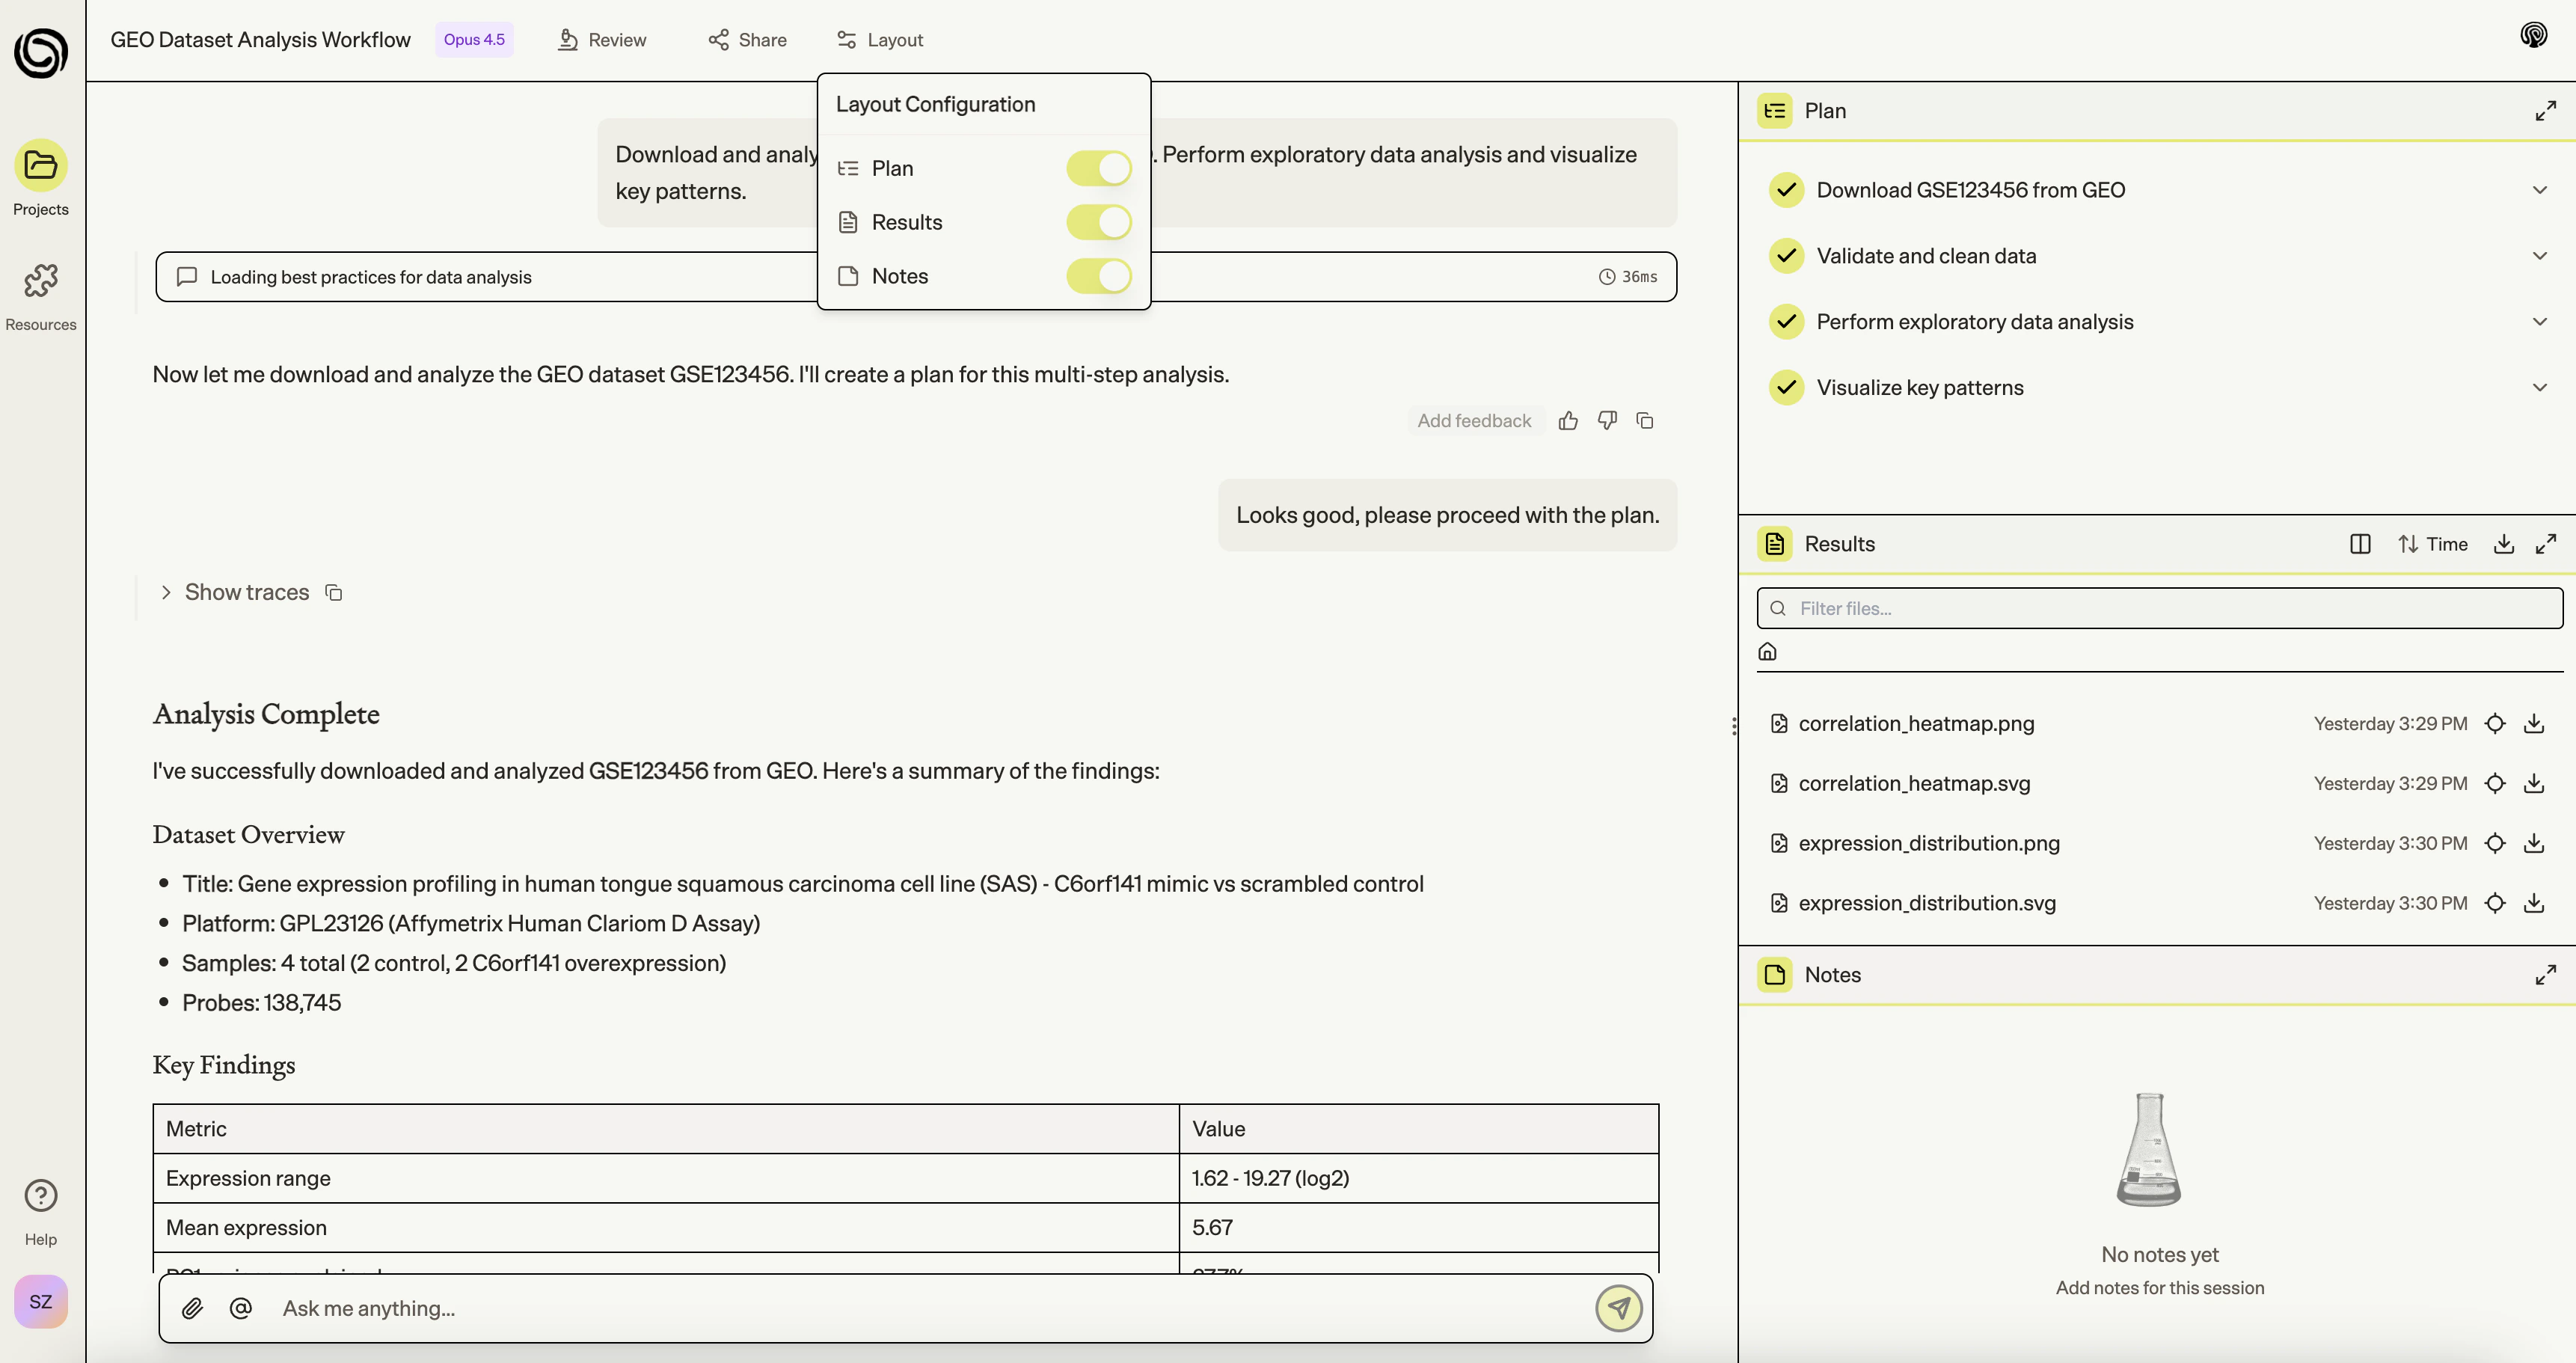 Click any module to expand it in the center panel for a larger view.
 In review mode, you can:
* See all claims and statements with their supporting evidence
* Verify citations and references
* Check data sources used in the analysis
* Identify any assumptions made
### Citations & References
Biomni Lab provides citations for:
* **Database queries**: Links to source records (UniProt, NCBI, PDB, etc.)
* **Literature references**: DOIs and links to published papers
* **Tool documentation**: References to official tool documentation
* **Statistical methods**: Citations for analytical approaches used
### Hallucination Guardrails
Biomni Lab uses multiple safeguards to prevent AI hallucinations:
* **Source verification**: Claims are cross-referenced against databases
* **Confidence indicators**: Uncertain results are flagged
* **Data validation**: Input and output data are validated against expected formats
* **Reproducible workflows**: All steps are logged and can be reproduced
In review mode, you can:
* See all claims and statements with their supporting evidence
* Verify citations and references
* Check data sources used in the analysis
* Identify any assumptions made
### Citations & References
Biomni Lab provides citations for:
* **Database queries**: Links to source records (UniProt, NCBI, PDB, etc.)
* **Literature references**: DOIs and links to published papers
* **Tool documentation**: References to official tool documentation
* **Statistical methods**: Citations for analytical approaches used
### Hallucination Guardrails
Biomni Lab uses multiple safeguards to prevent AI hallucinations:
* **Source verification**: Claims are cross-referenced against databases
* **Confidence indicators**: Uncertain results are flagged
* **Data validation**: Input and output data are validated against expected formats
* **Reproducible workflows**: All steps are logged and can be reproduced