
Connectors are set up per person. Connecting an account only lets the agent see what that account can already see—and only while it is working on a task you started.
Available connectors
Your organization chooses which connectors are available. Open Settings → Connectors to see the current catalog for your workspace. Organization admins can also add custom connectors for compatible MCP servers—see For organization admins.If you don’t see any connectors under Settings → Connectors, an organization admin may need to enable one first. Feature availability and the built-in connector catalog vary by workspace.
Connecting a connector
- Open Settings → Connectors.
- Find the connector under MCP Connectors and click Connect.
- Complete sign-in using one of the methods below.
- OAuth
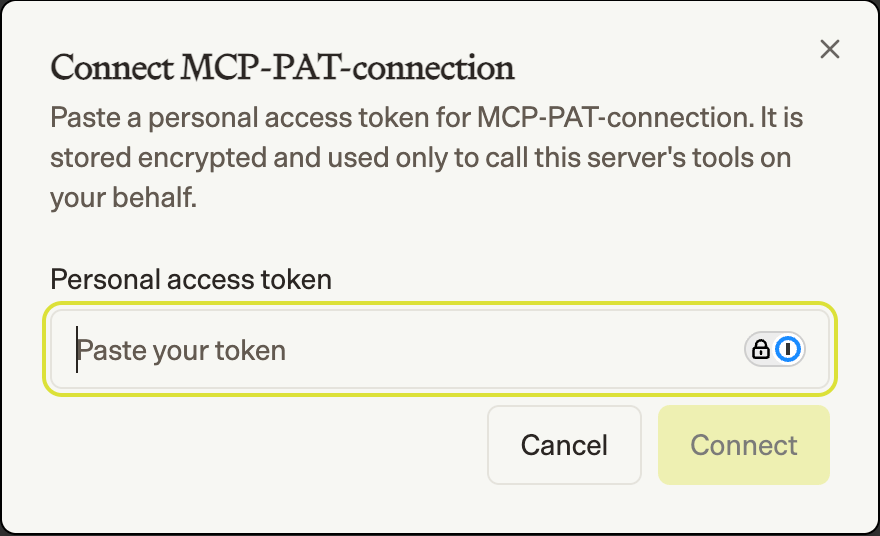
- Personal access token
A popup opens to the service’s sign-in page. Approve access, and the popup closes automatically. The row updates to show a Connected badge and the account you linked.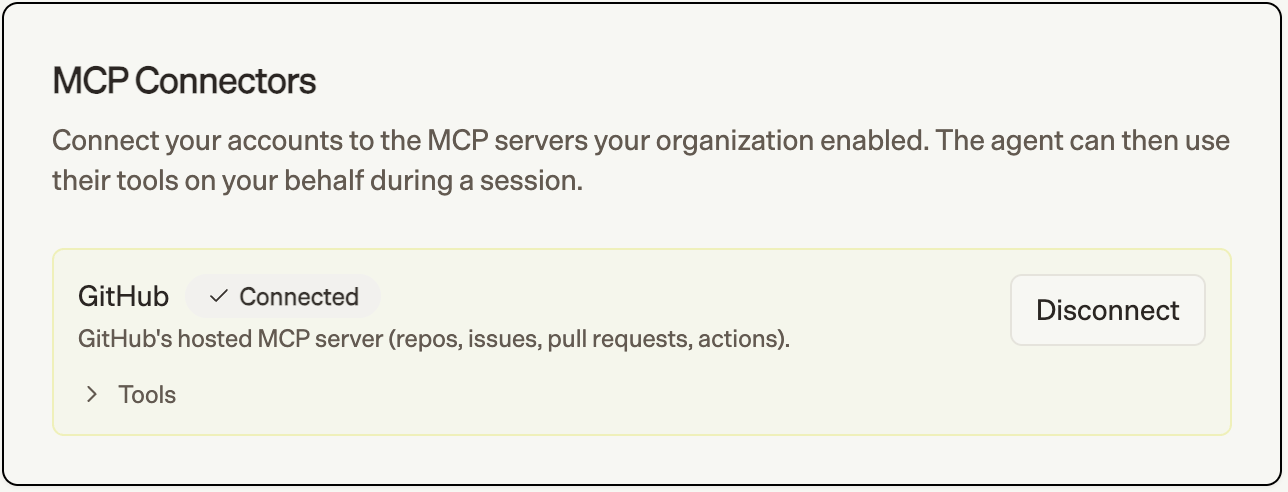
If nothing happens when you click Connect, your browser may have blocked the popup. Allow popups for this site, then try connecting again.
Using connector tools in a task
Once connected, just describe what you want—the agent picks the right tool automatically. You don’t need to@ mention anything.
Choosing which tools the agent can use
Each connected server exposes a set of tools. Expand Tools on a connected row to see them, grouped into Read-only and Write. Every tool has a switch—toggle one off to stop the agent from using it.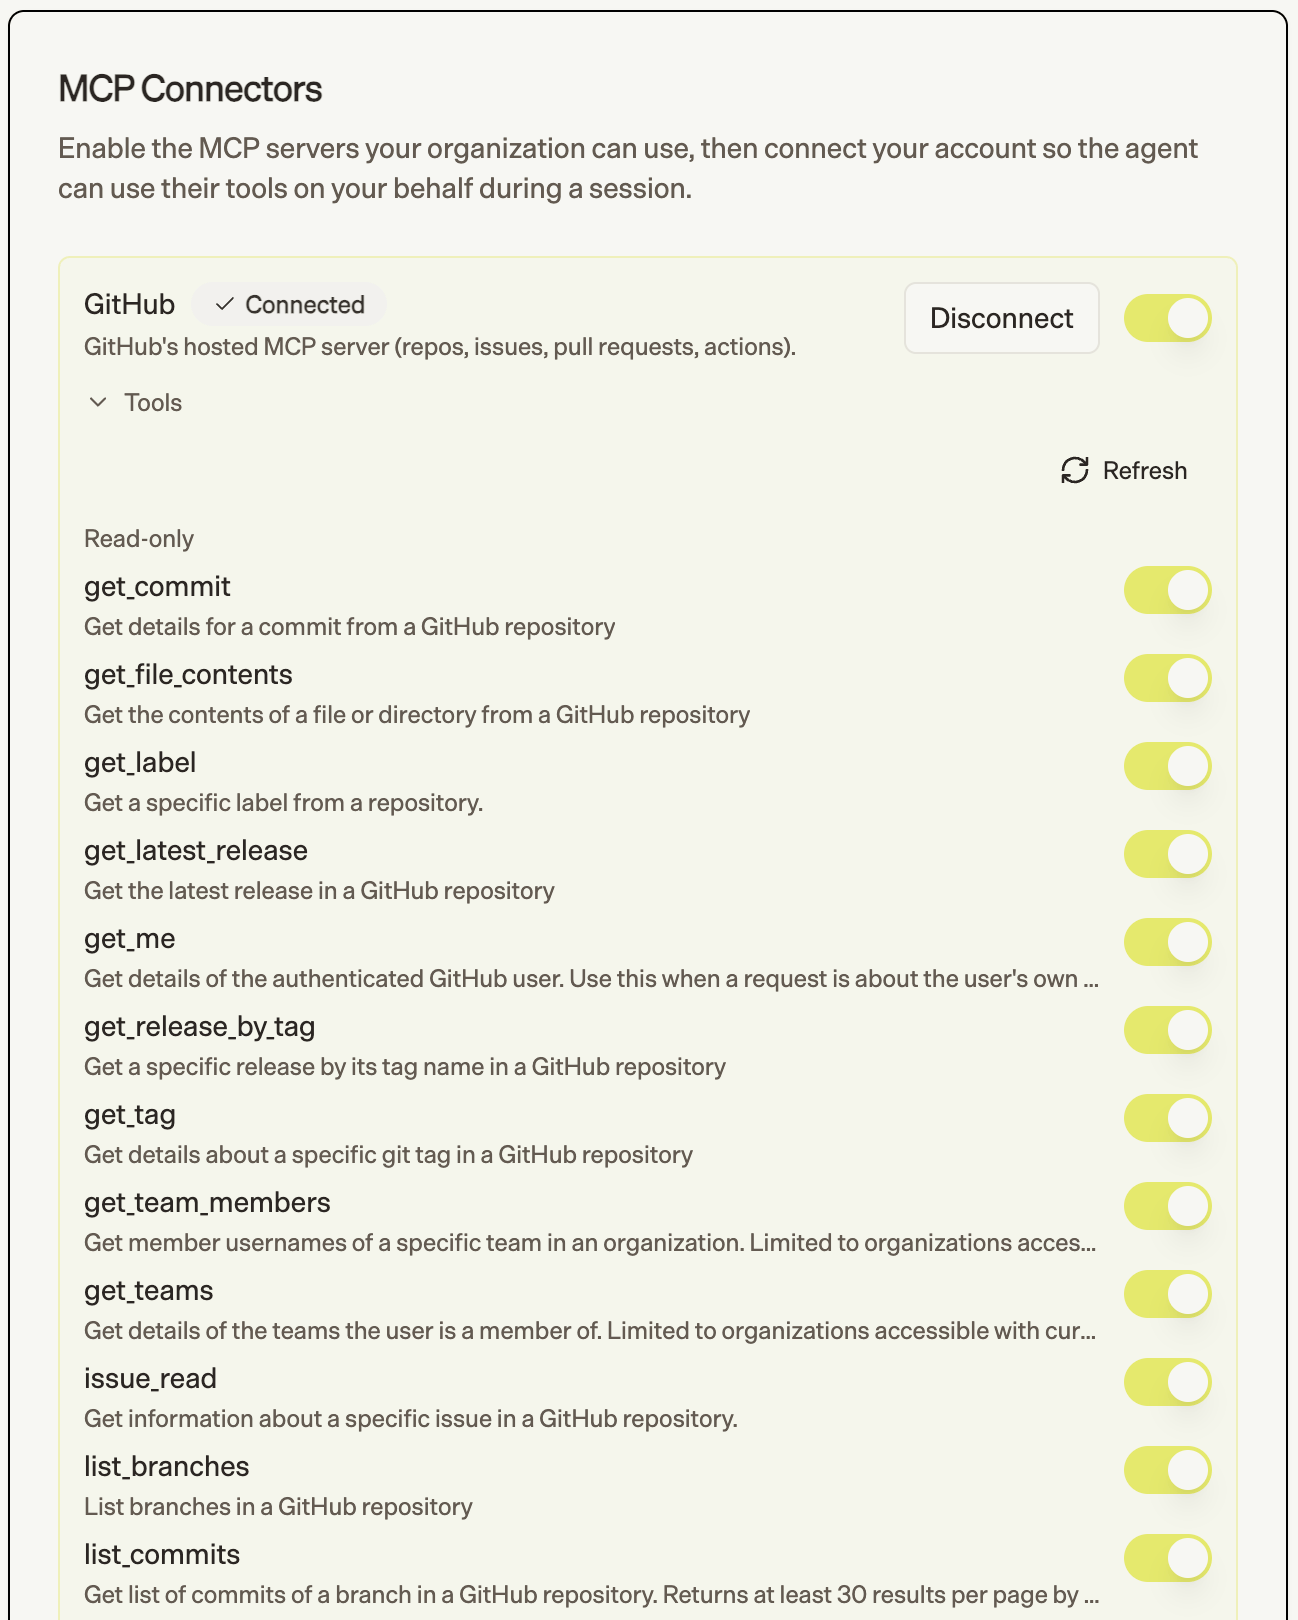
Disconnecting
Click Disconnect on a connected row to remove your account and stop the agent from using that server. You can reconnect anytime.For organization admins
Admins and owners control which connectors the whole organization can use.Manage the workspace connector catalog under Settings → Connectors.
Enabling a connector
Toggle a connector’s switch on to make it available to your members. They’ll then see it under Settings → Connectors and can connect their own accounts. Toggle it off to hide it again.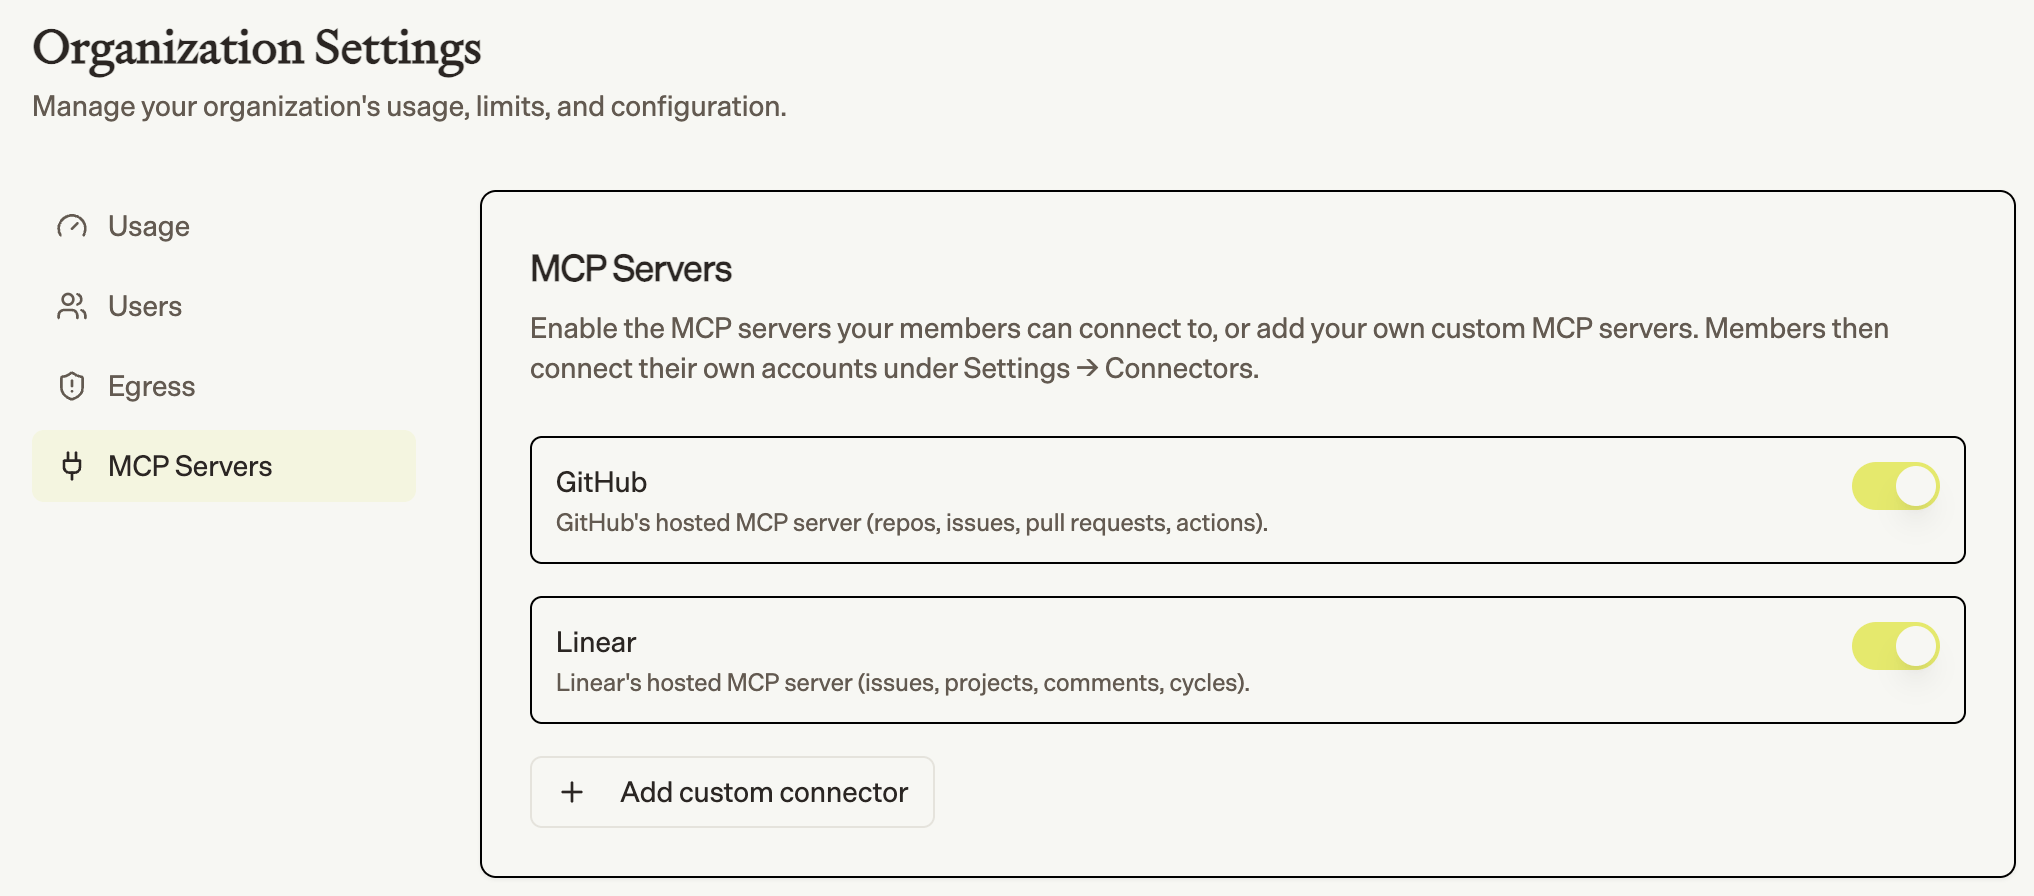
Adding a custom connector
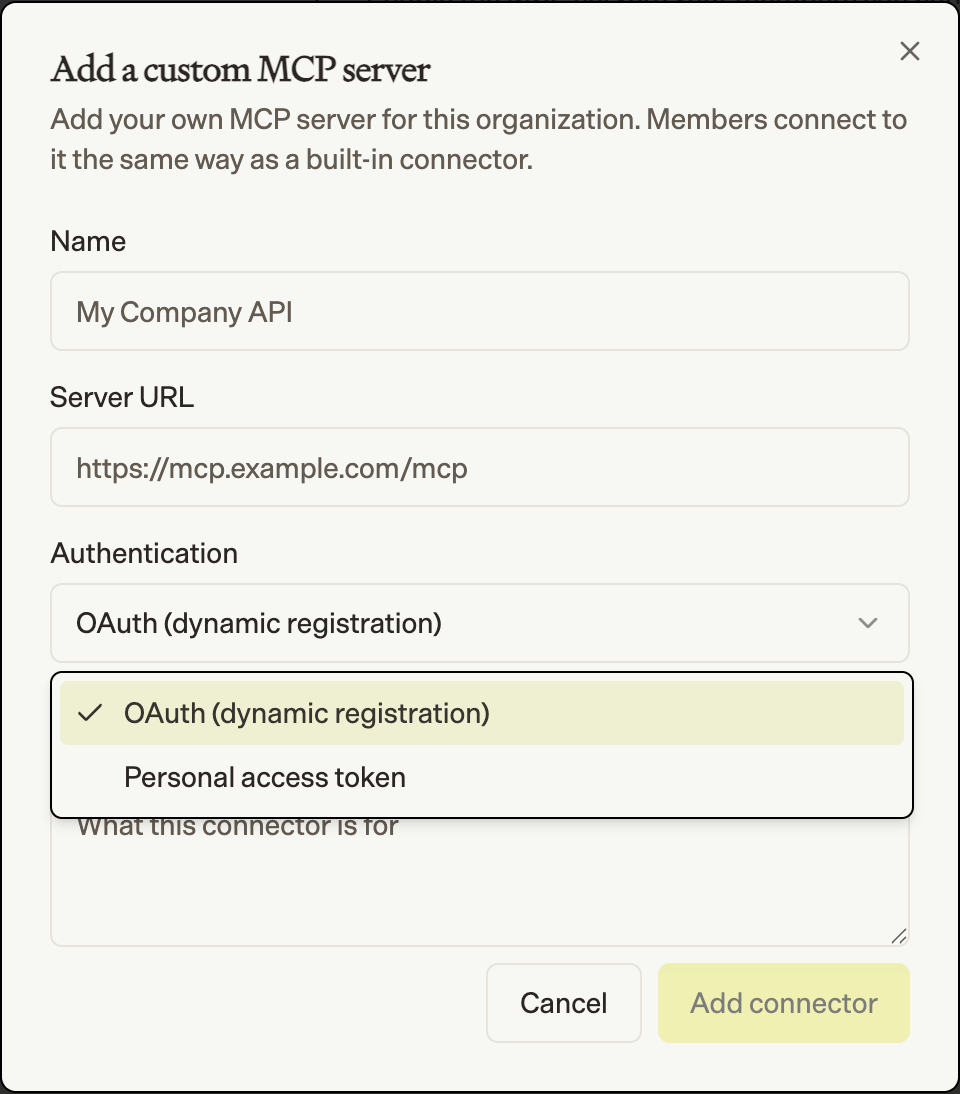
Connect any MCP server your team runs or subscribes to:- Click Add custom connector.
- Fill in the details:
- Name — how the connector appears to members (e.g. My Company API)
- Server URL — the server’s MCP endpoint (e.g.
https://mcp.example.com/mcp) - Authentication — how members sign in:
- OAuth (dynamic registration) — members sign in through the server’s OAuth flow
- Personal access token — each member pastes their own token
- Description (optional)
- Click Add connector.
Removing a custom connector
Click the delete icon on a custom connector and confirm. Built-in connectors can’t be deleted—only disabled.Security & privacy
- Per-person connections. Connecting is per user; the agent only ever acts with your own access.
- Encrypted at rest. OAuth tokens and personal access tokens are stored encrypted.
- Used only during your tasks. The agent calls connector tools on your behalf while working on a task you started.
- You stay in control. Disable individual tools or disconnect at any time. Admins control which connectors exist for the organization.